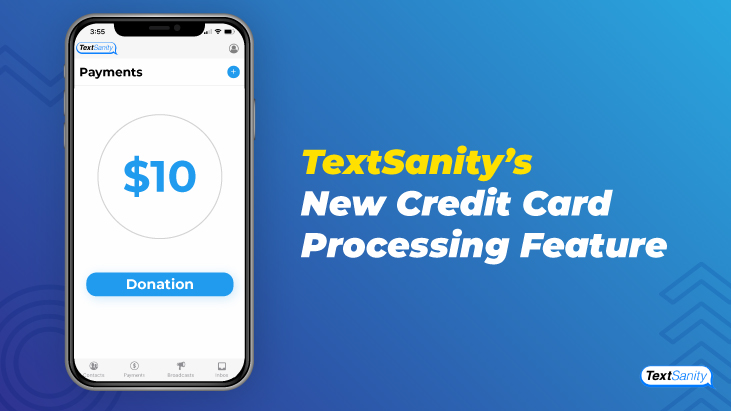
TextSanity’s New Credit Card Processing Feature
TextSanity’s new credit card processing feature goes live today! Now you can take advantage of a great way to collect subscriptions, donations, or item payments without the hassle of setting up or directing customers to another payment processor.
Here’s what you can look forward to in the new payment processing service.
- The credit card payment processing feature is part of your existing TextSanity account.
- Use our payment processor to easily funnel traffic to product, donation, or subscription pages.
- Setting up your TextSanity payment account will result in an additional $5 charge billed monthly to your TextSanity account. You can cancel this service anytime. Fees per transaction are 4.9% + 30¢.
How the TextSanity Payment Processor feature works
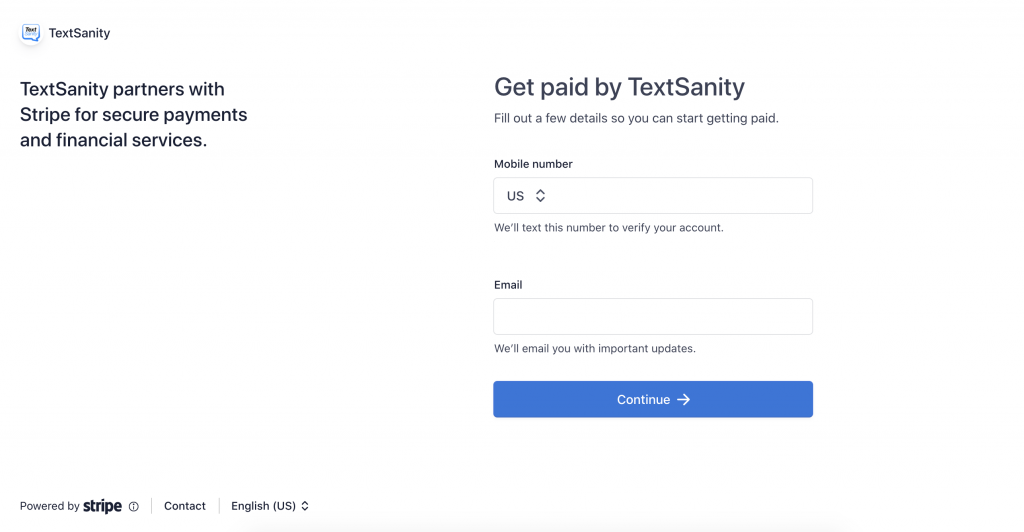
After providing bank information and a few personal details, receive money for products or donations. TextSanity partners with Stripe for secure payments and financial services.
There are three types of payments you can set up for customers.
- Donation
- Product
- Subscription
Connect your payout account
To get started, log in to your account. If you don’t have an account, go ahead and make one. Navigate to “More Tools” at the top of the main menu options. Click the drop down menu and select “Payments”. This will automatically open the payment feature of TextSanity.
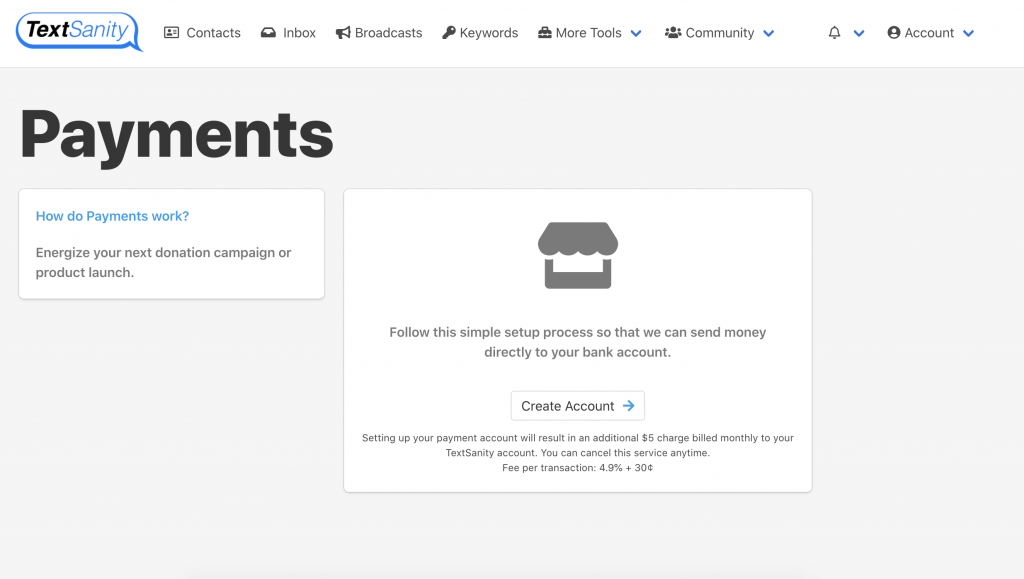
Once you’re in the payment feature, click “Create Account”. This will take you to the setup page, you’ll need to fill out a few details so you can start getting paid.
You’ll be asked to provide a number, which we will text to verify the account. Then, you’ll enter your email. You can provide the same email address as your TextSanity account or another email address if needed.
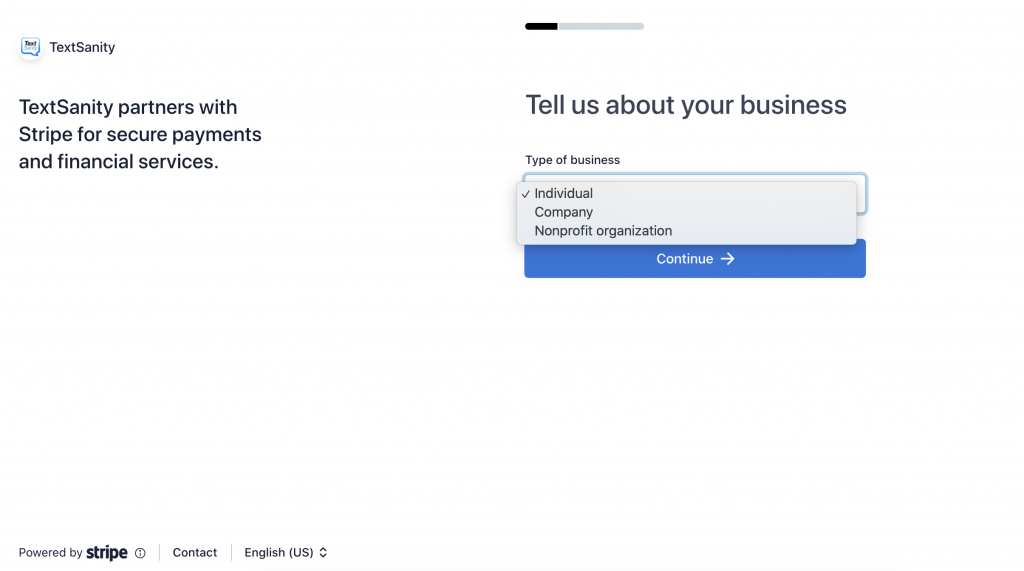
Once your phone number is verified, you’ll be asked to answer some questions that will give us a bit more information about your business. Choose your type of business – either Individual, Company, or Nonprofit Organization.
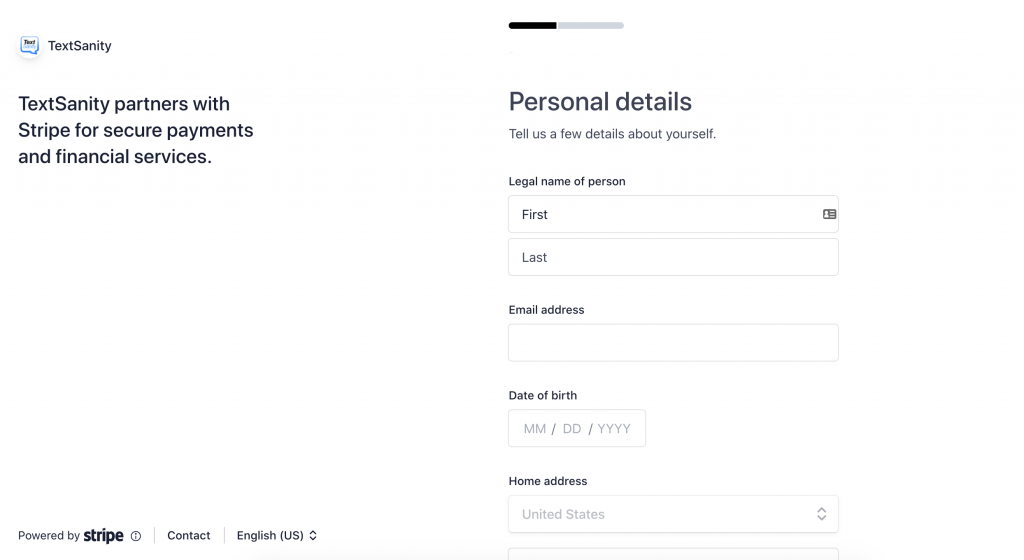
Once this is complete, you’ll enter a few personal details. Your legal name, email address, date of birth, address, phone number, and social security number.
Next, you’ll tell us some business details. The industry you work in as well as your business website. If you don’t have a website, don’t worry! You can share an app store link, a business social media profile, or add a product description instead.
Now you’re going to select an account for payouts. A payout is the transfer of funds from Stripe to your bank account. You can either enter a bank account or credit card.
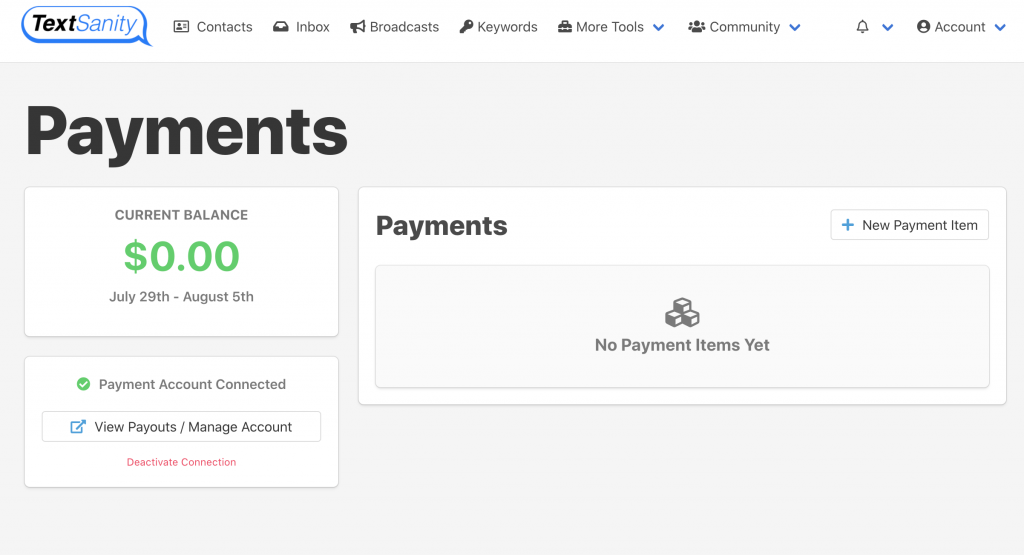
When that information is complete, you’ll review the details you entered, just to make sure you entered everything correctly. Once you review the information and click “Submit”, you’ll be redirected to the Payments feature of your TextSanity account.
To set up a payment for your customers, business, or product click “New Payment Item” at the top right hand side of the page. When you do, you’ll be asked to select the type of payment you want to create. You have three choices, as described previously. Here’s a few more details about each.
Donation payments
The first is Donation. Donation payments are a one-time payment that your customers, followers, or patrons can give to you or your business.
Product payments
The second is Product. Product payments slightly differ. As the name suggests, they’re for a specific product. In the set up, you’ll be prompted to enter an “Item Price”.
![]()
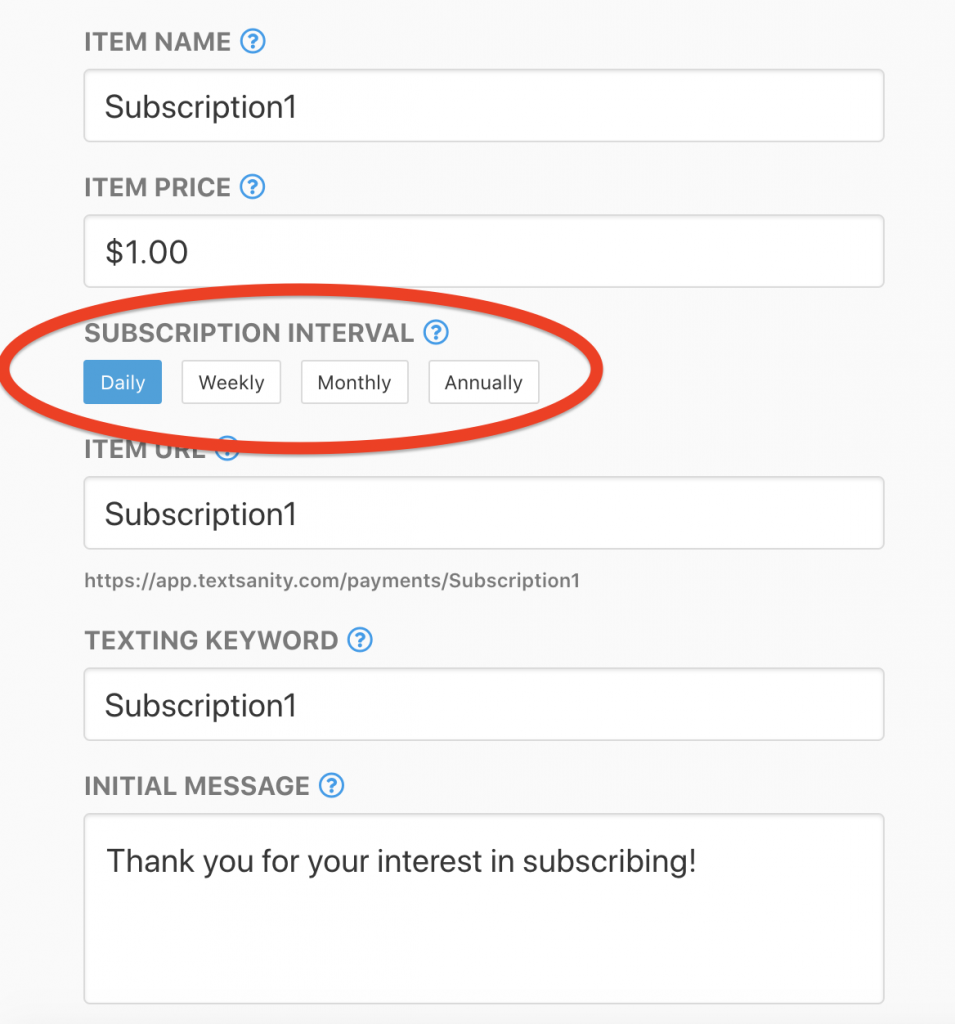
Subscription payments
The third is Subscription. Subscription payments are recurring payments that your customers or followers make on a regular basis. In the set up, you’ll be prompted to enter not only an “Item Price”, but a “Subscription Interval” as well.
This will determine how often customers will be changed. You can choose from daily, weekly, monthly, or annually. They will be charged on a regular basis starting with the day they sign up for the first payment.
Setting up a TextSanity Payments feature payment
The set up process is essentially the same for all types of payments.
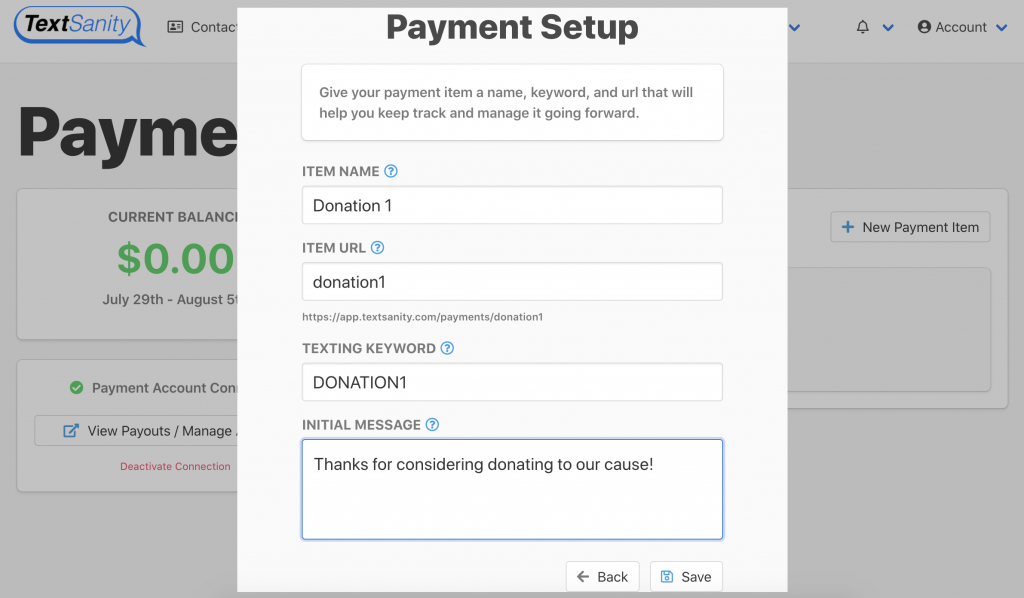
The first thing you will do is select the type of payment (either donation, product, or subscription) and then click next. You’ll be prompted to give your payment item a name, keyword, and url that will help you keep track and manage it going forward.
Remember, if you are setting up a product payment, you’ll need to enter an “Item Price”. And if you’re setting up a subscription payment, you’ll need to enter an “Item Price” and choose a “Subscription Interval”.
Item name
The item name is the name your item will be known by.
Item URL
The url is where you will direct web traffic to. This is your unique url where your product can be found.
Texting keyword
The keyword is the texting keyword. It helps potential customers interact with your item. When a potential customer texts your keyword to your TextSanity phone number, the customer is taken directly to your item’s page.
Initial message
The initial message is the message that a customer will receive when they send a text message containing your keyword.
Completing setup
Once you’ve entered the above information, click “Save”. You will be taken to your payment page for that specific product, donation, or subscription to customize it. For example, you can upload images that’ll appear on your page (up to 10), a title, description, and thank you message.
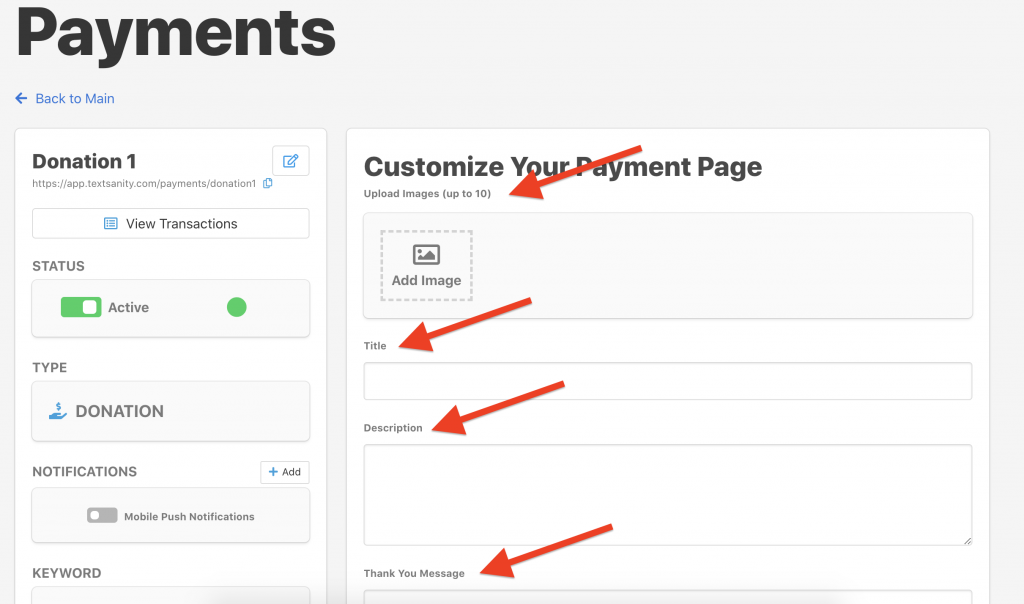
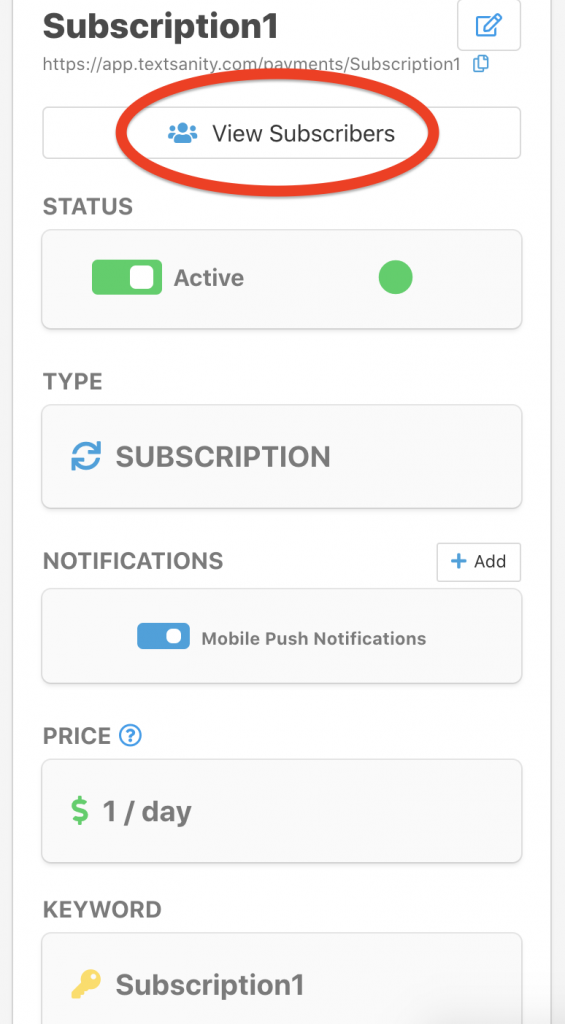
You can also change other details such as the status of the payment type – turning it on or off. Set up notifications to an email or phone number.
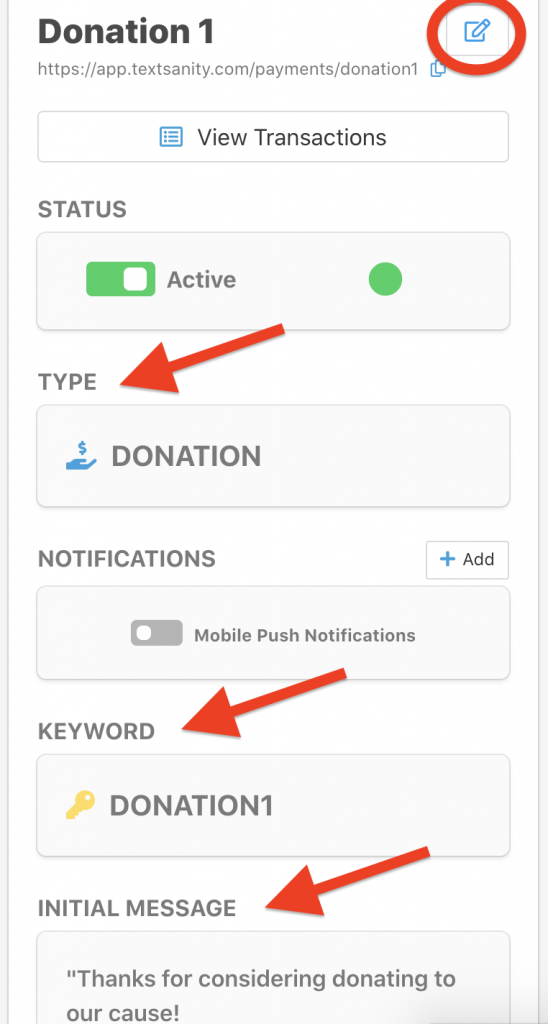
You can also view the type of payment, keyword, and initial message you set up. All of this can be changed by clicking the writing icon at the top right of this section.
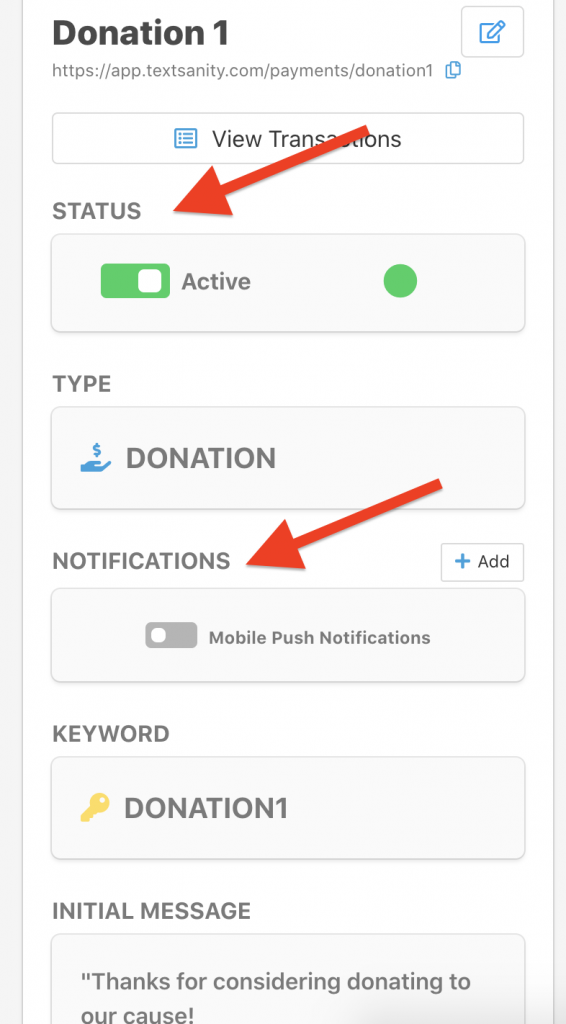
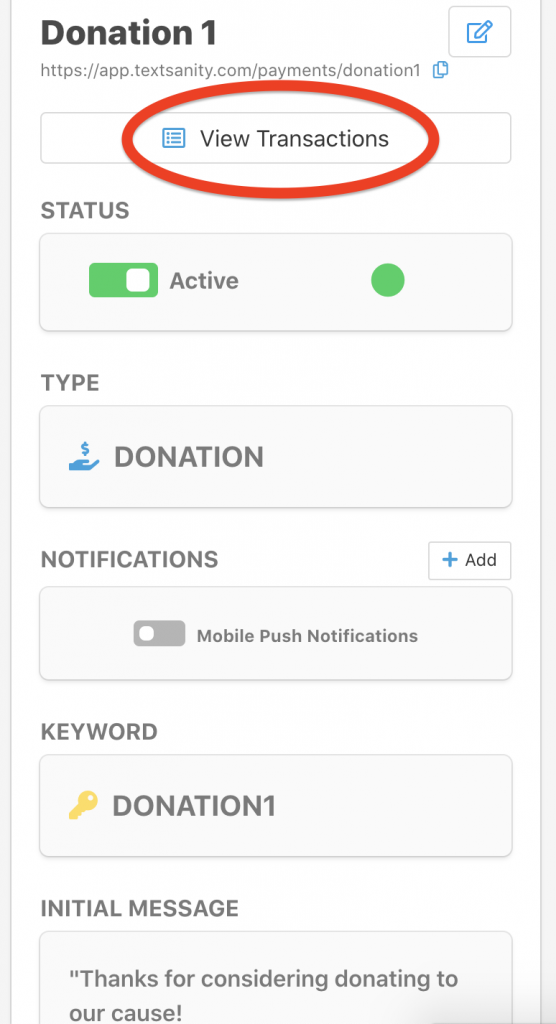
Additionally, once you start receiving payments for donations or products, you can view the transactions. Or if you are receiving payments for subscriptions, you can view the list of subscribers.
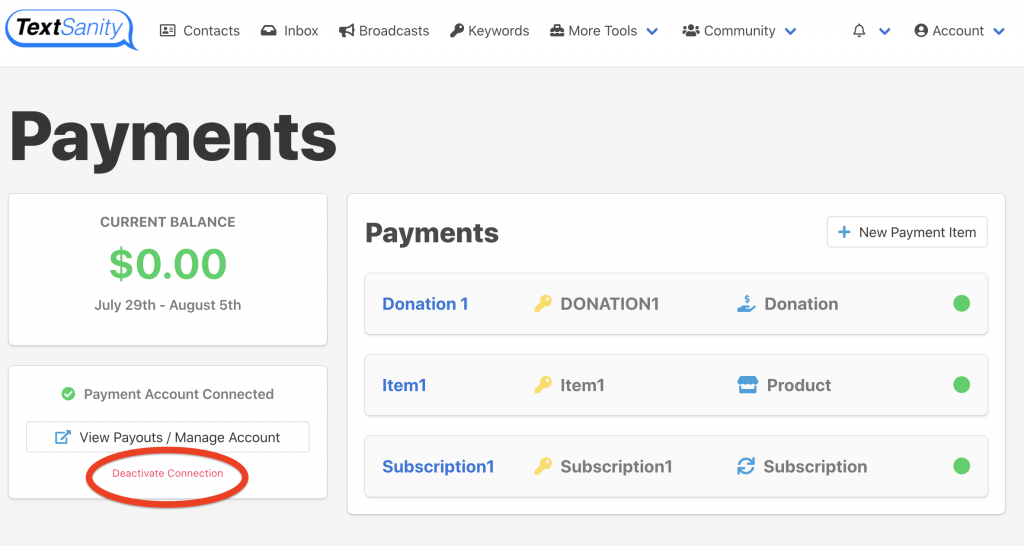
Remember, you can always manage your payment account by clicking “View Payouts/Manage Connection”. This will take you to a separate page that lists all transactions as well as the account your payouts are currently connected to.
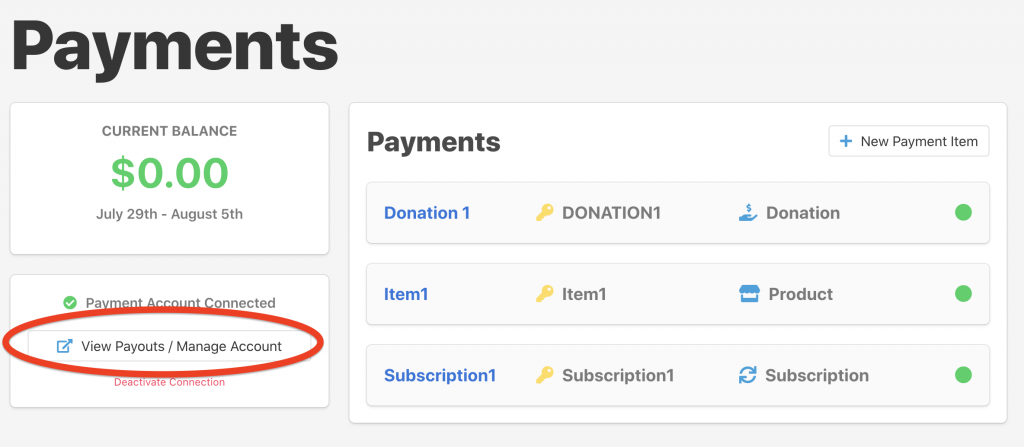
If you wish to discontinue payments, you can simply click “Deactivate Connection” at the bottom left hand side of the page. This will deactivate your account, so remember any payments received after doing so will not be credited to your account.
Set up a demo of TextSanity’s new payments processor feature
Overall, TextSanity’s new payments processor feature is a great way to receive money from customers, followers, patrons, and subscribers. As always, TextSanity customer support is here to help you with any questions you may have.
You can even set up a 10-15 minute customized demo of our service by texting DEMO to 50505. Or enter your phone number in the box below.
A customer support representative will be with you within 24 hours to discuss questions you may have or set up a live, customized demo.