How to Use a TextSanity Webform
A great way to opt contacts in to your TextSanity contact database is through a webform. You can place a webform in various places online. Social media, a link in a blog post, or even a link on your main website are all possibilities.
Webforms make opt-ins easy. Simply direct traffic to your webform’s custom URL and start sending mass text messages to the opted-in contacts.
How to Create a Webform
Webforms are easy to create and use. First, navigate to the webforms page. Do so by clicking on “More Tools” at the top of your TextSanity account and selecting webforms.
Second, click on the “+ New Webform” button at the top-right side of your page. Name your webform. Please note, this name will appear as the title on your webform.
Type in the tail end of the webform’s URL. Please note, if someone is using that URL, it will alert you below. Once you click “Create,” you will be taken to the webform details page.
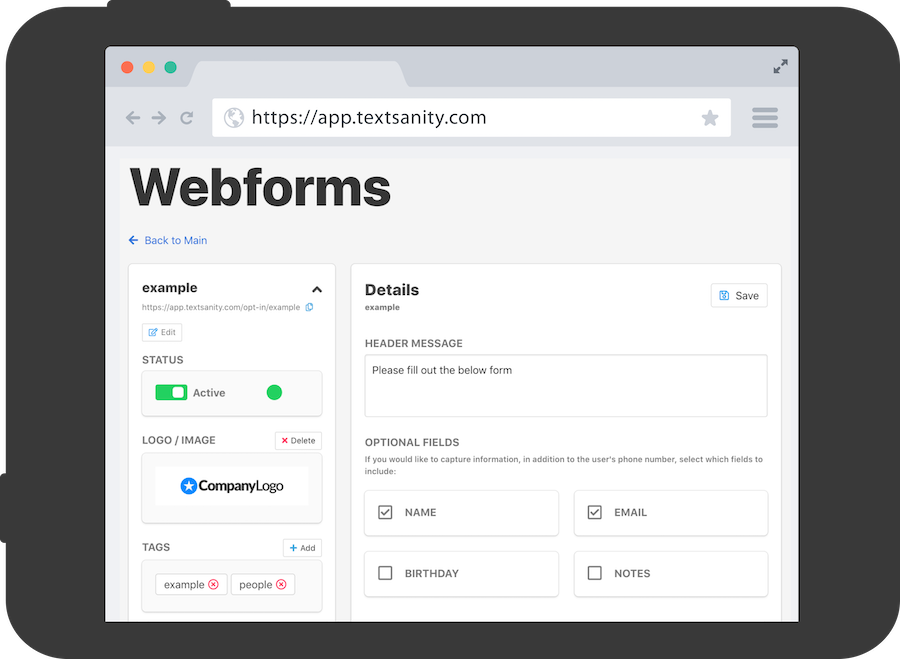
Here’s an example of an active webform (for a fake business).
![]()
Webform Details Page
On this page, you customize your webform. Every part of your webform is customizable. First, you’ll want to upload a logo or image to your webform. Typically this is your company logo or an image that represents your company.
Second, select or create the tags contacts will be tagged as when they opt-in through the webform. Third, compose your header message. It’s located on the right side of the page. The header will appear under the webform’s title.
Gathering Information
Below the header are optional fields used to gather more contact information. The phone number field is automatically on the webform; it’s the only mandatory field. Other optional fields include name, email, and birthday. How much information you ask for is up to you; simply ensure that you ask for the information that you need and will be useful to your text marketing purposes.

Once you choose which optional fields you’d like, the webform is complete. Click “Save” at the top-right corner of the screen. You can activate or deactivate your webform by clicking on the toggle at the top of the left column.
Try the Webform
Try out your webform. Open it by copying the URL, which is at the top of the left column under the webform’s title, and pasting it in your web browser. If you are satisfied with the webform, it’s ready to be linked anywhere you’d like.
Posting your Webform on Social Media
To post your webform on social media, simply paste the URL in your social media feed. A default Image, Title, and Description are pre-populated. You can customize the social media image, title, and description on the Webform Details Page in TextSanity. You can preview what the webform post will look like by clicking on the “Social Media Preview” button on the right side of your page.

TextSanity Webforms
TextSanity webforms are perfect to opt-in customers online. Easily design webforms that fit your marketing goals. Webforms make opt-ins easy. Simply direct traffic to your webform’s custom URL, let your target audience opt themselves in, and start sending mass text messages immediately. There has never been an easier, all online, way to opt-in your target audience than with TextSanity’s webforms.